Disclosure: This post may contain affiliate links, meaning I get a commission if you decide to make a purchase through my links, at no extra cost to you.
A Dremel is a perfect tool to use for engraving glass. Dremel tools are light, versatile, and can run at a high rpm. A Dremel tool will give you the ability to spruce up that old boring glass tea cup you got in the cabinet or to make a beautiful piece of art on a glass surface. So how do we achieve this with a Dremel?
When engraving glass a Dremel we use diamond bits to trace a pattern onto the glass. We tape the pattern to the inside of the glass and trace the outlines of the pattern with a small round diamond bit, then we fill in the spaces with a larger round diamond bit.
In this article, I will show the entire process of engraving a pattern on a teacup from start to finish. And I will do my best to answer all the questions you might have about engraving glass with a Dremel.
How to Engrave Glass With A Dremel
Engraving glass with a Dremel is actually very easy to do, and you will be able to make beautiful art from the beginning. Let’s go!
1. The Best Dremel Model For Engraving Glass
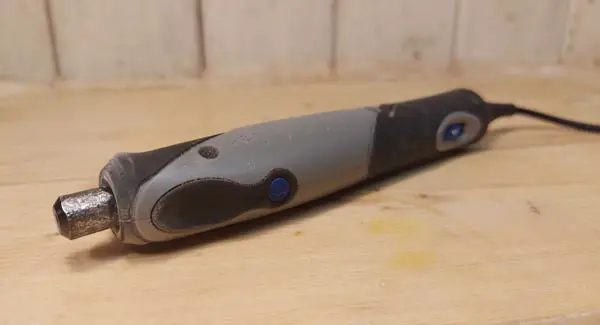
The best Dremel for engraving glass is the Dremel Stylo+ 2050 (Amazon). The Stylo+ is so light, versatile, and maneuverable that it becomes a joy to do details with. The tool is also fairly effective at filling in the larger spaces and gaps.
Tools for engraving glass should be comfortable to use and should not inhibit the movement of your hand in any way.
Another option is using a Dremel model with the flex shaft attachment, the flex shaft is also light, small, and maneuverable. But it is a little bit harder to achieve smooth lines with it.
Dremel also has a rotary tool called the Dremel Engraver 290, which is specifically made for engraving. But I do not have any experience with the tool yet. But I just bought it so I will update the article when I get to use it and tell you if it is worth getting.
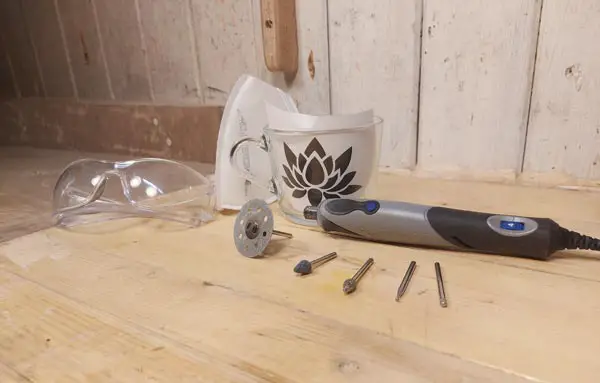
2. Safety Gear For Engraving
When engraving glass we grind off small specs of glass dust with our diamond bits. We have to protect ourselves from glass dust, and avoid it from reaching our lungs as much as possible.
We want to use a dust mask or a filter mask to protect ourselves from the glass dust. I use an N95 mask, but a filter mask would give even more protection.
Good ventilation also helps to reduce dust particles from staying around in the air.
And we always want to use protection glasses when using a Dremel, in the case of glass shards or bits coming towards your eyes.
3. Bits For Engraving Glass

The best bits for engraving glass with a Dremel are small round diamond bits. The Dremel 7103 and 7105 are the best bits for doing detailed engraving on glass.
These are the bits that I seem to use 95% of the time when engraving. But there are some other bits that can also be helpful.
Grinding stones can be helpful for some engravings, they are especially useful when you want to create shading in your engravings or you want to smooth out an area. An example would be the #84922 Silicone Carbide Grinding Stone.
The Dremel Engraving Kit 729-01 (Amazon) includes all the bits you need for engraving glass.
If you are engraving and filling in larger areas, the Diamond Wheel SC545 will be helpful as it can cover a large area very quickly. It is similar to going from a smaller paintbrush to a larger one, it is just faster and saves time but is not as good for detailing and outlining.
4. Where To Find Patterns For Engraving
I love finding new patterns to engrave. It is so simple and there are so many opportunities out there.
What you have to do is to find a website that provides free images. Good examples of such sites are pixabay.com or unsplash.com.
In the search bar on the image site, type “silhouette” followed by the object you want to engrave. If you want to engrave a deer, search for “Silhouette Deer”. And you will get a wide range of images and patterns to choose from.
For the pattern I am engraving in this article, I searched “Silhouette Lotus”. Click Here for that exact pattern on pixabay.
You can usually use pictures from these sites for personal use, but not always for commercial use. Be sure to read up on their copyright policies before using their images.
5. Size The Image
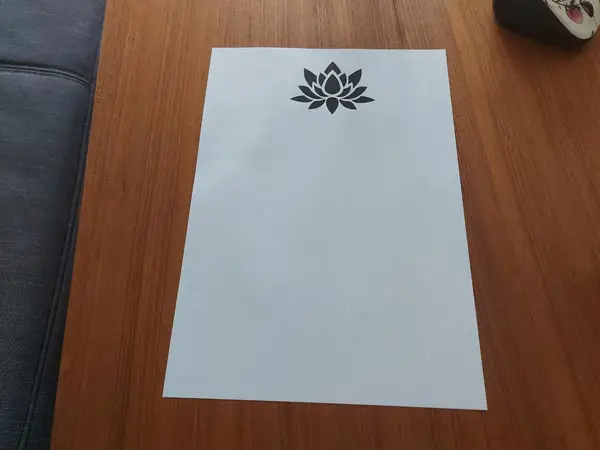
After we have found the pattern we want to engrave, we need to get it to the right size. The right size of course depends on the object we are doing the engraving on and the personal preferences of the engraver.
To resize the pattern I put the image file in a program that can manipulate images in some way. These can be Microsoft word, Adobe Illustrator, Paint, Photoshop, Google Docs, and more. Whatever you prefer.
Make a new page in A4 paper size, use an A4 paper as a reference to the size of the pattern, resize the pattern to the preferred size and print it out when you are finished.
It may take a couple of tries the first time before you are happy with the size.
6. Find Something To Engrave On
We are really close to starting the engraving, but first, we need to find something to engrave.
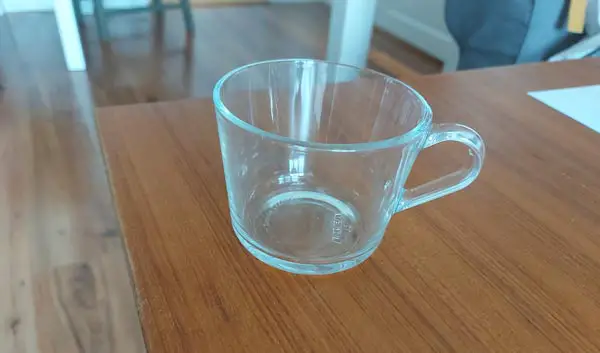
An open clear glass tea cup like you see on the is perfect for doing engravings. You can buy these for cheap at Ikea.
There are no designs on this cup and the cup is wide open so that we can tape the pattern on the inside.
Another option you can use is just a flat piece of glass. Any clear glass object where you can access the inside and tape the pattern will work just fine.
7. Trace Outlines Of The Pattern
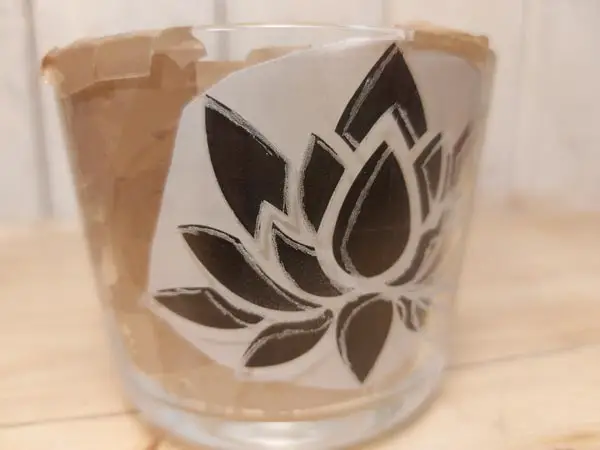
Now we have our glass object, the pattern is taped to the inside, we chose which Dremel to use and we have decided what bits to use.
Now we are ready to start tracing.
Turn on your Dremel and set RPMs anywhere from 20 000 to 35000. On the Stylo+, use speed setting 4 and 5 for engraving.
It might be a little bit intimidating doing the first couple of lines. The most important thing is to just start engraving, we are going to make some mistakes anyways so we might as well do them fast and try again.
Start with engraving the outlines of the pattern with a small round diamond bit. The Dremel #7103 round engraving bit is perfect for doing the outlines. The lotus flower has very clear sectioned pedals so it is easy to separate the shapes.
Outline all the sections of the pattern before you start filling in the pattern.
When outlining, try to do the lines in one pass. And try not to squiggle too much back and forward. It is going to be hard not to squiggle the lines in the beginning, so don’t worry if it happens a little bit.
But keep in mind that we want to work towards clean continuous lines, this will come with some training. (I still squiggle my lines a lot, so don’t worry)
We can always fix and clean up the lines if we mess some up.
8. Fill in the Pattern
Creating an outline of the pattern will make it so much easier for us to fill in the rest of it.
Now we have several clear sections that we can focus on one at a time.
I usually transition to a larger diamond bit when filling in the sections. The Dremel #7105 Diamond bit is a great bit for filling in larger sections while still keeping the ability to do detailed work.
Filling in the sections is very straight forward just scribble inside of the lines like you would when coloring a drawing.
9. Tips and Tricks For Engraving Glass With A Dremel
The glass dust will frequently cover the pattern when engraving. Keep a dry cloth beside you when working to dust off glass dust and to get a better look at the pattern/engraving. Or just wipe it of with your hand.
For right-handed people, engrave the lines with the motion of the tool coming towards you. If you engrave away from you, the bit will jump more and the lines will be jerkier.
Have good lighting where you work. It makes it so much easier to work.
Don’t try to make perfect lines. As you can see, my lines are not really perfect at all and they could be much cleaner. But I still like the end result.
The thicker the glass is, the harder it is to follow the pattern. When the pattern is taped on the inside of the glass, the pattern will change position in relation to the outside engraving depending on which angle you look at the pattern from.
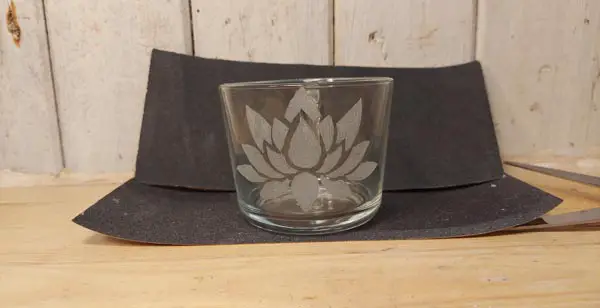
10. Final Product

Here is the final product. It is not perfect but I am happy with it. And the good thing is that if I can do it, you can do it too. This pattern about 30 – 45 minutes.
Now go out there and do some engraving. Don’t worry too much about getting the lines perfect, it will come with practice. Enjoy picking out different patterns and making beautiful gifts for your family.
When you start engraving it is better to make five quick good engravings rather than focusing on making one perfect one.
Have fun!